|
Three Interesting Schematic Topics
A detailed discussion of the schematics is way beyond the scope of this article but instead, let’s take a look at three interesting aspects of the design:
- Secrets of the Plate Regulator
- Magic in the Virtual Ground Amplifier
- Rejecting Hum and Noise with a Synchronous Rectifier
 Secrets of the Plate Regulator Secrets of the Plate Regulator
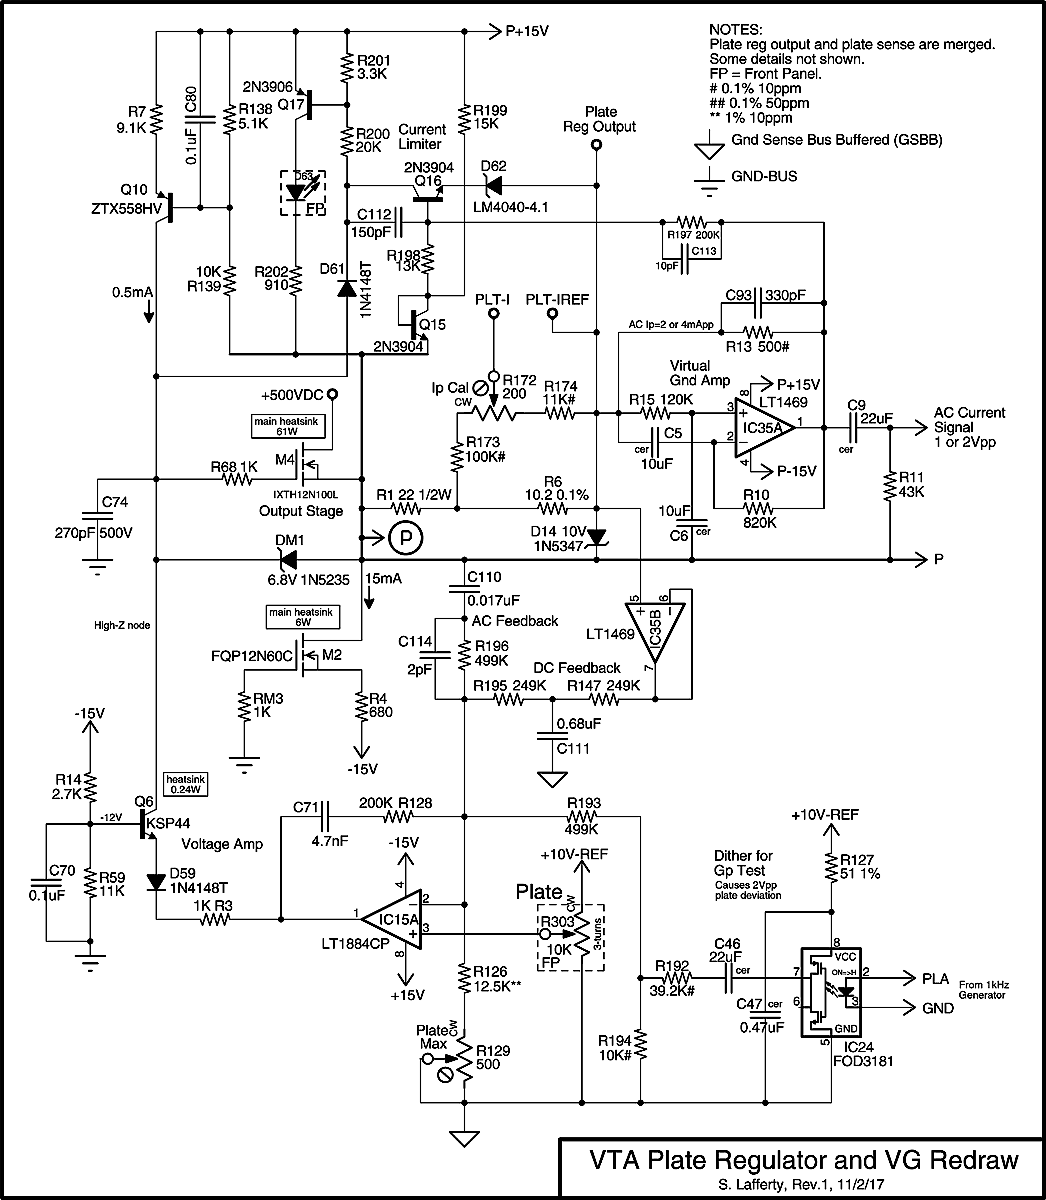
With all the markups in the official Main board schematic, we have redrawn here the plate regulator and virtual ground amp schematic in two forms: A conceptual level schematic and a fairly complete schematic (with a few details suppressed). If desired, you can right-click on the thumbnail at right, select “Open link in new window,” and the concept schematic will come up in a separate window. The plate regulator (plate reg) consists of everything except the Virtual Ground Amp (VGamp) area. We’ll cover that below.
Let’s get an overview of the plate reg first. The Plate voltage pot, R303, provides a 0 to 10V voltage to loop amplifier, IC15A, which drives voltage amplifier, Q6. It’s collector develops the 400V swing needed. Source follower M4 buffers this voltage, driving the plate reg output through resistor, R1. DC feedback is taken from the output back to the loop amp inverting input. The feedback sets up an overall gain of 40X, yielding the required 400V output swing from the 10V control swing.
Dual band trick lets the VGamp handle the AC current
The plate reg must somehow provide the DC output while allowing the VGamp to provide all AC current. The VGamp develops an AC signal corresponding to the AC current it provides and we use this signal for Gm and Gp readings. The plate reg allows the VGamp to dominate AC output by inserting R1 at its output. (Highlighted at right.) To avoid DC voltage errors from the resistor drop, it takes DC feedback (<2Hz) from after the resistor. At the same time, AC feedback (>2Hz) comes from before the resistor (R1). The two feedback bands are complementary, so the net effect is roughly flat frequency response. However, the AC output resistance from the plate reg is about 32 ohms, while its DC output resistance is close to zero. That lets the VGamp take over for AC currents. Incidentally, the VTA measures DC plate current by the drop across part of R1, so the current metering doesn’t cause output voltage error. Also, since AC feedback is from the M4 source, that point is stiffened, AC-wise. More about this in the VGamp section.
Current limiter circuit
The other plate reg circuit shown in the conceptual schematic is the current limiter, represented by Q16. It monitors the voltage drop across R1. When it reaches the voltage of D62 (which is actually a shunt regulator IC), Q16 turns on, pulling down the drive to M4. This happens at about 130mA. It’s so fast, that you can short the output at 400V and not even see a spark. Stability of the current limiter loop is assured by making Q16 an integrator, based on R198 and C112. The original plate reg design used a different current limiter. Making it stable and reliable under all loading conditions was a major challenge. Actually, problems with the originally complex circuitry preceding M4 were part of the problem. In the end, that circuitry was removed and the limiter was replaced. (Hence all of the markups of the original plate schematic and the mod board attached to the bottom.)
Magic in the Virtual Ground Amplifier (VGamp)
Tube testers which measure true Gm generally use a small resistor (perhaps 10 ohms) in series with the plate supply to measure AC current, as seen for the “Conventional Method” below right. However, the VTA is specified to be able to measure plate resistances (as conductance) down to 500 ohms. If AC plate current sampling depended on a 10 ohm series resistor, that would introduce an error of about 2% at the minimum Rp—a factor of 20X above the overall 0.1% accuracy goal! Clearly, some strong magic is needed.
That comes in the form of the “Virtual Ground Method” shown below right. The opamp acts like a unity-gain buffer, presenting near-zero output impedance to the tube. This practically eliminates the error due to a sampling resistor and low plate resistance. You can see the similarity to an ordinary unity-gain buffer by imagining the 500 ohm resistor as being much smaller in value. As the resistor is increased, the voltage swing at the opamp output increases but the gain between its input terminals remains unity. The opamp strives to keep it’s input terminals at the same voltage. In doing that, it must supply the current demanded by the vacuum tube load. That current can only come from the the opamp output and must flow through the feedback resistor.
Measuring the voltage across the resistor gives us the current. That could be done directly but since the voltage across the opamp inputs is nearly zero, measuring from the plate supply to the output is just as good. It has the benefit of keeping meter parasitics out of the way. A side benefit of the VGamp is that we need not keep the feedback resistor very low and the voltage developed in this example is 50 times higher than the conventional method!
AC-coupled version of the VGamp
 The problem with trying to use a VGamp in the VTA is that it would try to supply all of the current to the tube and that would require the opamp to source 130mA of DC. Since the VGamp only needs to deal with AC signals, we can AC-couple it as shown at right. That relieves the DC burden but the opamp still does supply all AC current. The low frequency corner is made as low as practical to minimize droop in the square wave test signal. The problem with trying to use a VGamp in the VTA is that it would try to supply all of the current to the tube and that would require the opamp to source 130mA of DC. Since the VGamp only needs to deal with AC signals, we can AC-couple it as shown at right. That relieves the DC burden but the opamp still does supply all AC current. The low frequency corner is made as low as practical to minimize droop in the square wave test signal.
One more thing about the VGamp: In the concept schematic, I merged the Plate drive and sense nodes, since they are connected at the tube pin, anyway. Actually, they’re separate and the VGamp takes advantage of the fact that they are routed separately to the socket. C5 (the VGamp reference point) goes through the sense line and R13 (the VGamp drive) goes through the drive line. The result is that the VG low impedance point is carried all the way to the plate pin. Not significant you say? Recall that the minimum Rp to be measured is 500 ohms and 0.1% of that is only 0.5 ohms. The wiring and switches could amount to a substantial part of that.
Competition for AC current
How accurate is the AC current measurement made by the VGamp? We’ve seen how it vanquishes the effect of plate resistance but the most critical issue is how well it competes with R1 in attempting to supply all of the AC current. The residual impedance of the virtual ground (VG) is effectively in parallel with R1. The overall accuracy goal of 0.1% puts an upper bound on the VG impedance at 0.032 ohms. Let’s disregard the fact that loss to R1 is largely eliminated in adjusting Gm and Gp calibration. That will be relied upon as the factor to make the error a small portion of the accuracy budget.
 At left is a simulation showing the total impedance of the VG and the regulator, in parallel. This is what is presented to the tube. Above 1Hz, it’s dominated by the VG. You can see that it’s below 0.01 ohms from below 1kHz to 2kHz and stays below 0.032 ohms up to about 5kHz. Thus, it easily supports the 0.1% accuracy goal. At left is a simulation showing the total impedance of the VG and the regulator, in parallel. This is what is presented to the tube. Above 1Hz, it’s dominated by the VG. You can see that it’s below 0.01 ohms from below 1kHz to 2kHz and stays below 0.032 ohms up to about 5kHz. Thus, it easily supports the 0.1% accuracy goal.
To achieve this, the VGamp, IC35, needs extraordinary bandwidth, which is provided by the superb, LT1469 opamp (about $7). In addition to 90MHz gain bandwidth (typ, 25C), it offers excellent DC characteristics, including 125uV max offset voltage and 10nA max input bias current. (See datasheet for details!) The low bias current on the inverting input limits plate current offset to 0.05mA max (20uA typ). Stability is assured by the large division ratio in the AC feedback (R13 and R1) and by a 330pF cap bypassing R13.
Virtual Ground method improves Gp resolution by 3.2X
By the way, another benefit of the VG method is that it lets us reduce the effects of noise and low signal level. This in turn extends the range of high Rp (low Gp) and low Gm measurements, and keeps the AC signals low. It all comes down to being able to measure very low AC currents at the plate reg output. For a pentode with Rp=1Mohm, the plate AC test level of 2Vpp gives us just 2uApp (just 2 microamps, peak-to-peak!) of AC current to measure. For the conventional 10 ohm series resistor, that results in a signal level of only 20uVpp. That’s at least 1000 times smaller than the output of a classic phono cartridge (10mVrms)!
Without the VGamp connected, there would be 64uV across R1 (32 ohms) in the VTA. Relative to amplifier input noise, we get 3.2 times the voltage signal-to-noise ratio with the VG method. (That’s 10dB!) This supports our claim in the “Some Special Features” subsection that the VG method “improves Gp resolution by 3X”. (Gp resolution is directly related to signal level because it’s limited by DC stability and noise.) Moreover, the VGamp recovers the Gp signal as 1mVpp, far better than 20uVpp from the 10 ohm series resistor. The VTA has more magic to deal with noise and that’s discussed in the next section...
Rejecting Hum and Noise with a Synchronous Rectifier
Besides DC measurements, the VTA measures transconductance (Gm) and plate conductance (Gp) using square wave AC signals. Square waves are used for the following reasons:
- Very accurate amplitude square wave signals can be generated easily with an analog switch and voltage ref.
- Gp measurements with square waves can be made to ignore parasitic capacitance.
- Square wave level is more easily and/or accurately measured than average or RMS sine levels.
Granted, all of these are rather “soft” reasons and for each, sine measurements could be defended using appropriate technology. Perhaps the clincher was that a particular adaptation of synchronous rectification was found which lends itself to square wave signals. We’ll cover that shortly.
I guess the most popular rectifier for accurate AC level detection is an average-responding precision rectifier, and an example is shown at right (without a smoothing filter). One problem for this approach is that it rectifies noise signals just as well as desired signals. A solution would be to precede it with a bandpass filter but that can lead to variations in gain as the filter drifts. It could be tough to achieve 0.1% accuracy with a selective bandpass filter.
Instead, the VTA uses a synchronous rectifier, as illustrated in the concept at left. It’s shown with sine analog signals for clarity but in the VTA they’re square waves. Since the signals are generated digitally, the clock is available. The rectifier uses an analog switch to alternate between the inverted analog signal and non-inverted. Switching is synchronized with the signal itself so the output is always a single polarity. The smoothing filter has a time constant similar to the one in the VTA—almost half a second. The simplified schematic at left shows the rectifier in more detail. Since it’s operating at plate voltage, optocouplers are used for generator signals.
|
The most important thing about this technique for us is that the only kind of signal which can affect the average DC output is one which is synchronized with the clock. Random noise, hum and spurious signals are chopped-up and averaged-out by the slow smoothing filter. It’s a very selective way to detect a signal of known phase and frequency.
Why square wave signals work well with synchronous rectification
 A potential problem with measuring square wave amplitude is that transient effects at the edges could be nonlinear and that would cause inaccuracy in an averaging measurement. The VTA addresses this by using a special receiving technique, illustrated at left. Only the center 50% of the AC current signal is used, during which the signal is averaged by the smoothing filter. For the rest of the time, the filter goes into a hold mode. You can see how this is implemented in the synchronous rectifier schematic above left. The Gating switch is closed only during the integration period, so the VTA makes optimal use of the good part of the signal. Decoding the gating signal is easy, since the 1kHz (actually 977Hz) is derived from a 2MHz crystal oscillator using a binary counter. The 128us interval before the integration periods is plenty of time for complete settling. Of course, efforts were still made to have the waveforms as clean as practical. The illustration exaggerates the issue. A potential problem with measuring square wave amplitude is that transient effects at the edges could be nonlinear and that would cause inaccuracy in an averaging measurement. The VTA addresses this by using a special receiving technique, illustrated at left. Only the center 50% of the AC current signal is used, during which the signal is averaged by the smoothing filter. For the rest of the time, the filter goes into a hold mode. You can see how this is implemented in the synchronous rectifier schematic above left. The Gating switch is closed only during the integration period, so the VTA makes optimal use of the good part of the signal. Decoding the gating signal is easy, since the 1kHz (actually 977Hz) is derived from a 2MHz crystal oscillator using a binary counter. The 128us interval before the integration periods is plenty of time for complete settling. Of course, efforts were still made to have the waveforms as clean as practical. The illustration exaggerates the issue.
 Justifying the claims of square wave advantages Justifying the claims of square wave advantages
Let’s review the claims made at the beginning of this section, in the light of the explanations so far:
Very accurate amplitude square wave signals can be generated easily with an analog switch and voltage ref.
The lightly-loaded, CMOS-output, optocoupler circuit at right combines simplicity with precision. There is only 0.12% loss from the reference voltage and that is removed with the Gp calibration.
 Gp measurements with square waves can be made to ignore parasitic capacitance. Gp measurements with square waves can be made to ignore parasitic capacitance.
In the VTA, capacitance on lines going to the tube sockets has been measured as high as 74pF. With the square wave test signal, the capacitance only causes a current spike at the leading edge (as at left) and that part is ignored by the integration period in the flat region. [In the simulation shown, 2000pF was used just to make it visible!] Thus, the square wave test totally ignores parasitic capacitance. In a conventional AC current test, the reactance of 74pF at 1kHz is only about 2Mohm which would totally spoil an attempt to measure Rp at 1Mohm (Gp at 1umho).
 Square wave level is more easily and accurately identified than average or RMS sine levels. Square wave level is more easily and accurately identified than average or RMS sine levels.
The following is just a complicated way of saying that square waves are easier to measure because they hold still at peak value and sine waves are always changing: Measuring a sine level usually means using a precision rectifier as described above. The circuitry must reproduce the waveform accurately and the result is averaged. How well the sine is tracked depends on the bandwidth and linearity of the opamps. At the zero crossing point, the opamp which has been off during the previous half-cycle, must jump 1.4V from the negative clamp-diode level to the forward voltage of the output diode. That’s delayed by the slew rate and limited bandwidth of the opamp. Hence, there is a gap in the output waveform as shown at left. In contrast, the center-integration technique for square waves has plenty of time to acquire the exact amplitude and it averages that over time to eliminate noise.
Advice for Builders
As was mentioned at the beginning of this article, it would be difficult and expensive to reproduce the VTA. However, for those intrepid souls who might want to persevere and build one, I offer these thoughts. I begin by asking myself the question: “If I wanted to build another unit, what would I do?” My approach might include:
- Consider simplifying the screen and grid regulators by giving them the discrete transistor current limiter mod used for the plate. The hope would be to eliminate the two ±15V auxiliary supplies for the screen and grid. Of course, that would require breadboard testing.
- Modify the layout to incorporate the mod board mounted on the bottom and to include the various mods. Though the layout is very dense, a good bit of the existing plate regulator circuitry was idled, making room available.
- Have the new board fabricated.
However, what I would advise someone else to do would be totally different. Sadly, I must move on to other things and it would be tough for anyone else to pursue the steps above. Instead, the least risky approach for an experienced builder is covered below.
 An Alternative Project An Alternative Project
Before getting into that, let’s consider an alternative project which can make similar measurements: Dr. Ronald Dekker’s µTracer 3+, shown at right. (The Tronola article on our build of the µTracer is here.) I only became aware of the uTracer in recent years. This small but powerful tube tester/curve tracer can be purchased as a partial kit for € 225 (presently $272) including shipping. The builder must provide an enclosure, pin switching, a laptop-type AC adapter and a few other parts. Over 1400 units have been shipped to some 48 countries, from the Netherlands. The uTracer makes pulsed measurements lasting only 1ms or so, whereas the VTA makes conventional, continuous-time ones. The uTracer also requires a PC, which provides the user interface.
Why would one want to pursue the difficult and expensive VTA project when such a convenient, proven and affordable alternative is available? First, let me say that before the VTA project was started in 2010, I had actually done a mostly complete design of a pulsed, microcomputer-controlled tester, along the lines of the uTracer. However, I realized that the results of pulsed testing might not be exactly the same as with continuous time testing. In a continuous test, one finds that Gm measurements of some tubes go through a trajectory. For example, they may start low, rise to a peak and then decay to a lower value. This is even after plenty of time for heater warm-up. It has to do with the condition of the cathode. [See footnote at the end.] A pulsed tester wouldn’t show this. Also, the manually-operated VTA can be more flexible in some ways. For example, after checking plate current at nominal grid bias, I adjust the bias for nominal plate current for Gm measurement, since it’s more consistent. Noting the required grid offset and current-based-Gm gives a more complete view of tube condition. It would be cumbersome to do this with the uTracer. I decided that I just wanted a good, simple, accurate, continuous-time tester and achieved all but the “simple” part.
However, after having built the VTA, I have now purchased a uTracer kit and am working on building that. Why? I want it for plotting tube characteristics automatically. Those can be plotted manually using the VTA but it’s far easier with the uTracer and therefore more likely to happen. I would also like to have another instrument for comparison with the VTA results. Anyway, to help answer the question of why one might choose the VTA or the uTracer, I’ve provided some comparisons below. After my build of the uTracer is completed I will be publishing the results on Tronola and updating this section.
Comparisons Between the VTA and the uTracer
Please note that while I will be frank about discussing differences between the two instruments, I have great respect for Dr. Dekker’s fine design. The level of cost-effectiveness he has achieved with this small, almost heatsink-free board is nothing short of amazing! It has already helped over a thousand hobbyists make measurements of their tubes. Please bear in mind that I have only limited familiarity with the uTracer, so while I’ve tried to be diligent about assessing its capabilities, I might have overlooked some things.
 |
|
|
|
|
VTA101
|
uTracer
|
|
Cost and complexity
|
Generous
$1800??
|
Frugal
$341-5375
|
|
Measurement type
Shows cathode fading/heating?
|
Continuous
Yes
|
Pulsed 1ms
No
|
|
Accuracy
|
0.1% goal for
primary ranges
|
No spec.
10bit ADC
Vref = 7805A
|
|
Grid/plate voltage resolution
Grid/plate current resolution
|
10mV / 0.1V
10nA / 10uA
|
50mV / 0.4V
NA1 / 1uA
|
|
Max plate current
Max screen current
|
100mA
20mA
|
200mA
200mA
|
|
Heater voltage range / resolution
|
1.25-13V/1mV
|
4.4-19V/30mV2
|
|
Heater max current
Heater supply type
|
3A
DC
|
1.6A
19V pulses
|
|
Heater supply supports?
6L6 EL34 6550 GZ34 5U4
|
Y Y Y Y Y
|
Y Y Y ? N
|
|
Gm, Rp measurement type
|
AC with synchronous detection
|
Differencing measurement pairs
|
|
Gm / Rp dither voltage P-P
|
100mV / 2V
|
10% of VDC
|
|
Gm resolution for
6L6 12AX7
EL84 6AU6
|
0.02% 0.008%
0.009% 0.02%
|
1.2% 0.8%
0.6% 2.0%
|
|
Rp resolution for
6L6 12AX7
EL84 6AU64
|
0.02% 0.08%
0.04% 1.5%
|
8.8% 0.8%
7.4% NA3
|
|
Ip change caused by Gm dither
6L6 12AX7
EL84 6AU64
|
0.8% 25%
2.4% 5.9%
|
12% 25%
17% 6.3%
|
|
Needs Win PC for operation?
Traces curves?
|
No
No
|
Yes
Yes
|
|
Construction challenges
|
Difficult, lots of kludges & hand wiring. No kit.
|
Moderate. Must make case. Partial kit.
|
|
|
The table at right shows some differences between the VTA and uTracer, based on published specs and technical info. Please take this as preliminary and approximate, as I will know more after the build.
The biggest difference is that the uTracer makes brief, 1ms measurements while the VTA runs continuously. There is far less heat and power involved with the uTracer and that is the main reason for its low cost and small size. Pulsed operation also makes it easy to provide high plate and screen current.
The next important difference is that accuracy is a major goal for the VTA whereas cost-effectiveness is emphasized for the uTracer. It’s voltage reference is simply the +5V regulator, whereas the VTA uses high stability, precision, voltage references. The VTA’s twin, 4.5-digit meters are equivalent to more than 14 bits while the uTracer uses the 10-bit ADC in the PIC controller. However, its range is greatly enhanced by including a programmable gain amplifier (PGA113), which accurately scales gain over a 200:1 range.
The heater supply of the uTracer has limitations and Dr. Dekker has written about those. The use of unfiltered pulses ends up compromising accuracy at low effective output voltages and measuring it is tricky. Max heater current doesn’t support some popular tubes but providing as much heater power as it does from such a small board, is remarkable. One clever thing about the uTracer: it stops its PWM switching during measurements, eliminating noise. The precision heater supply in the VTA is stable and accurate, extends down to 1.25V and supports almost all popular receiving tubes.
Unlike the uTracer, the VTA has an AC measurement system for Gm and Rp (as Gp). The uTracer struggles to measure Rp of power pentodes, with resolution error of about 8% in some cases. It pretty much can’t read small signal pentode Rp. That’s not a key parameter for judging the quality of a used tube though. Not many hobbyists lose sleep at night about the exact Rp of their 6AU6s.
One measurement not covered by the uTracer is grid current for negative bias. This is useful in testing for gas, leakage and grid emission. The VTA provides a very sensitive grid current range, with 0.01uA resolution. The VTA also measures heater current. A Windows PC is required to operate the uTracer. The upside of this is the ability to plot curves and to provide other computer-based features but the downside is that it’s more cumbersome if you just want to test a tube.
Perhaps the best things about the uTracer are the fact that it’s a very doable and affordable project and it’s been proven in over a thousand shipments. That makes it a spectacular success among hobbyist offerings of this kind. Dr. Dekker continues to offer kits and support and with such a large user base, the chances of a successful build are very high. Unfortunately, the extensive kludges and hand wiring required for the VTA make it something that only a very advanced hobbyist could build. Just sourcing the parts would be a major task.
In summary, the uTracer would certainly be the better choice for most hobbyists for ordinary tube testing, though the heater supply might need to be supplemented occasionally. For someone with the resources to build it, the VTA would be a more accurate, more versatile and wider range tool for testing tubes, but at many times the cost.
Least Risky Approach to Building the VTA
For someone determined to build the VTA101, the approach I would recommend follows:
- Start with the existing PCB. I have three available.
- Perform the mods covered in the VTA Main PCB Modifications document. (11MB)
- Contact me for details on later mods which were made. I will also be happy to help find substitutions for any parts which have become obsolete.
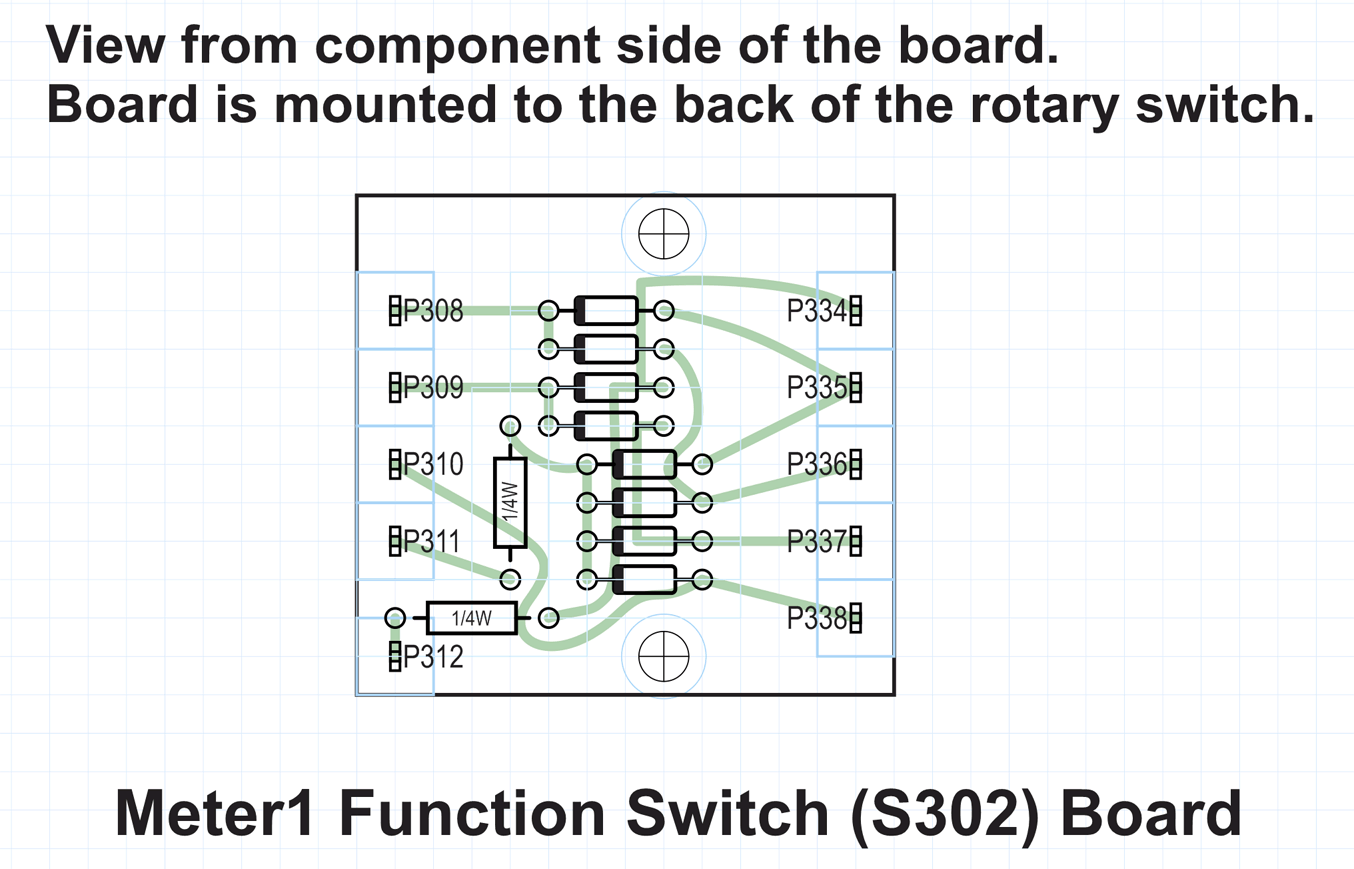
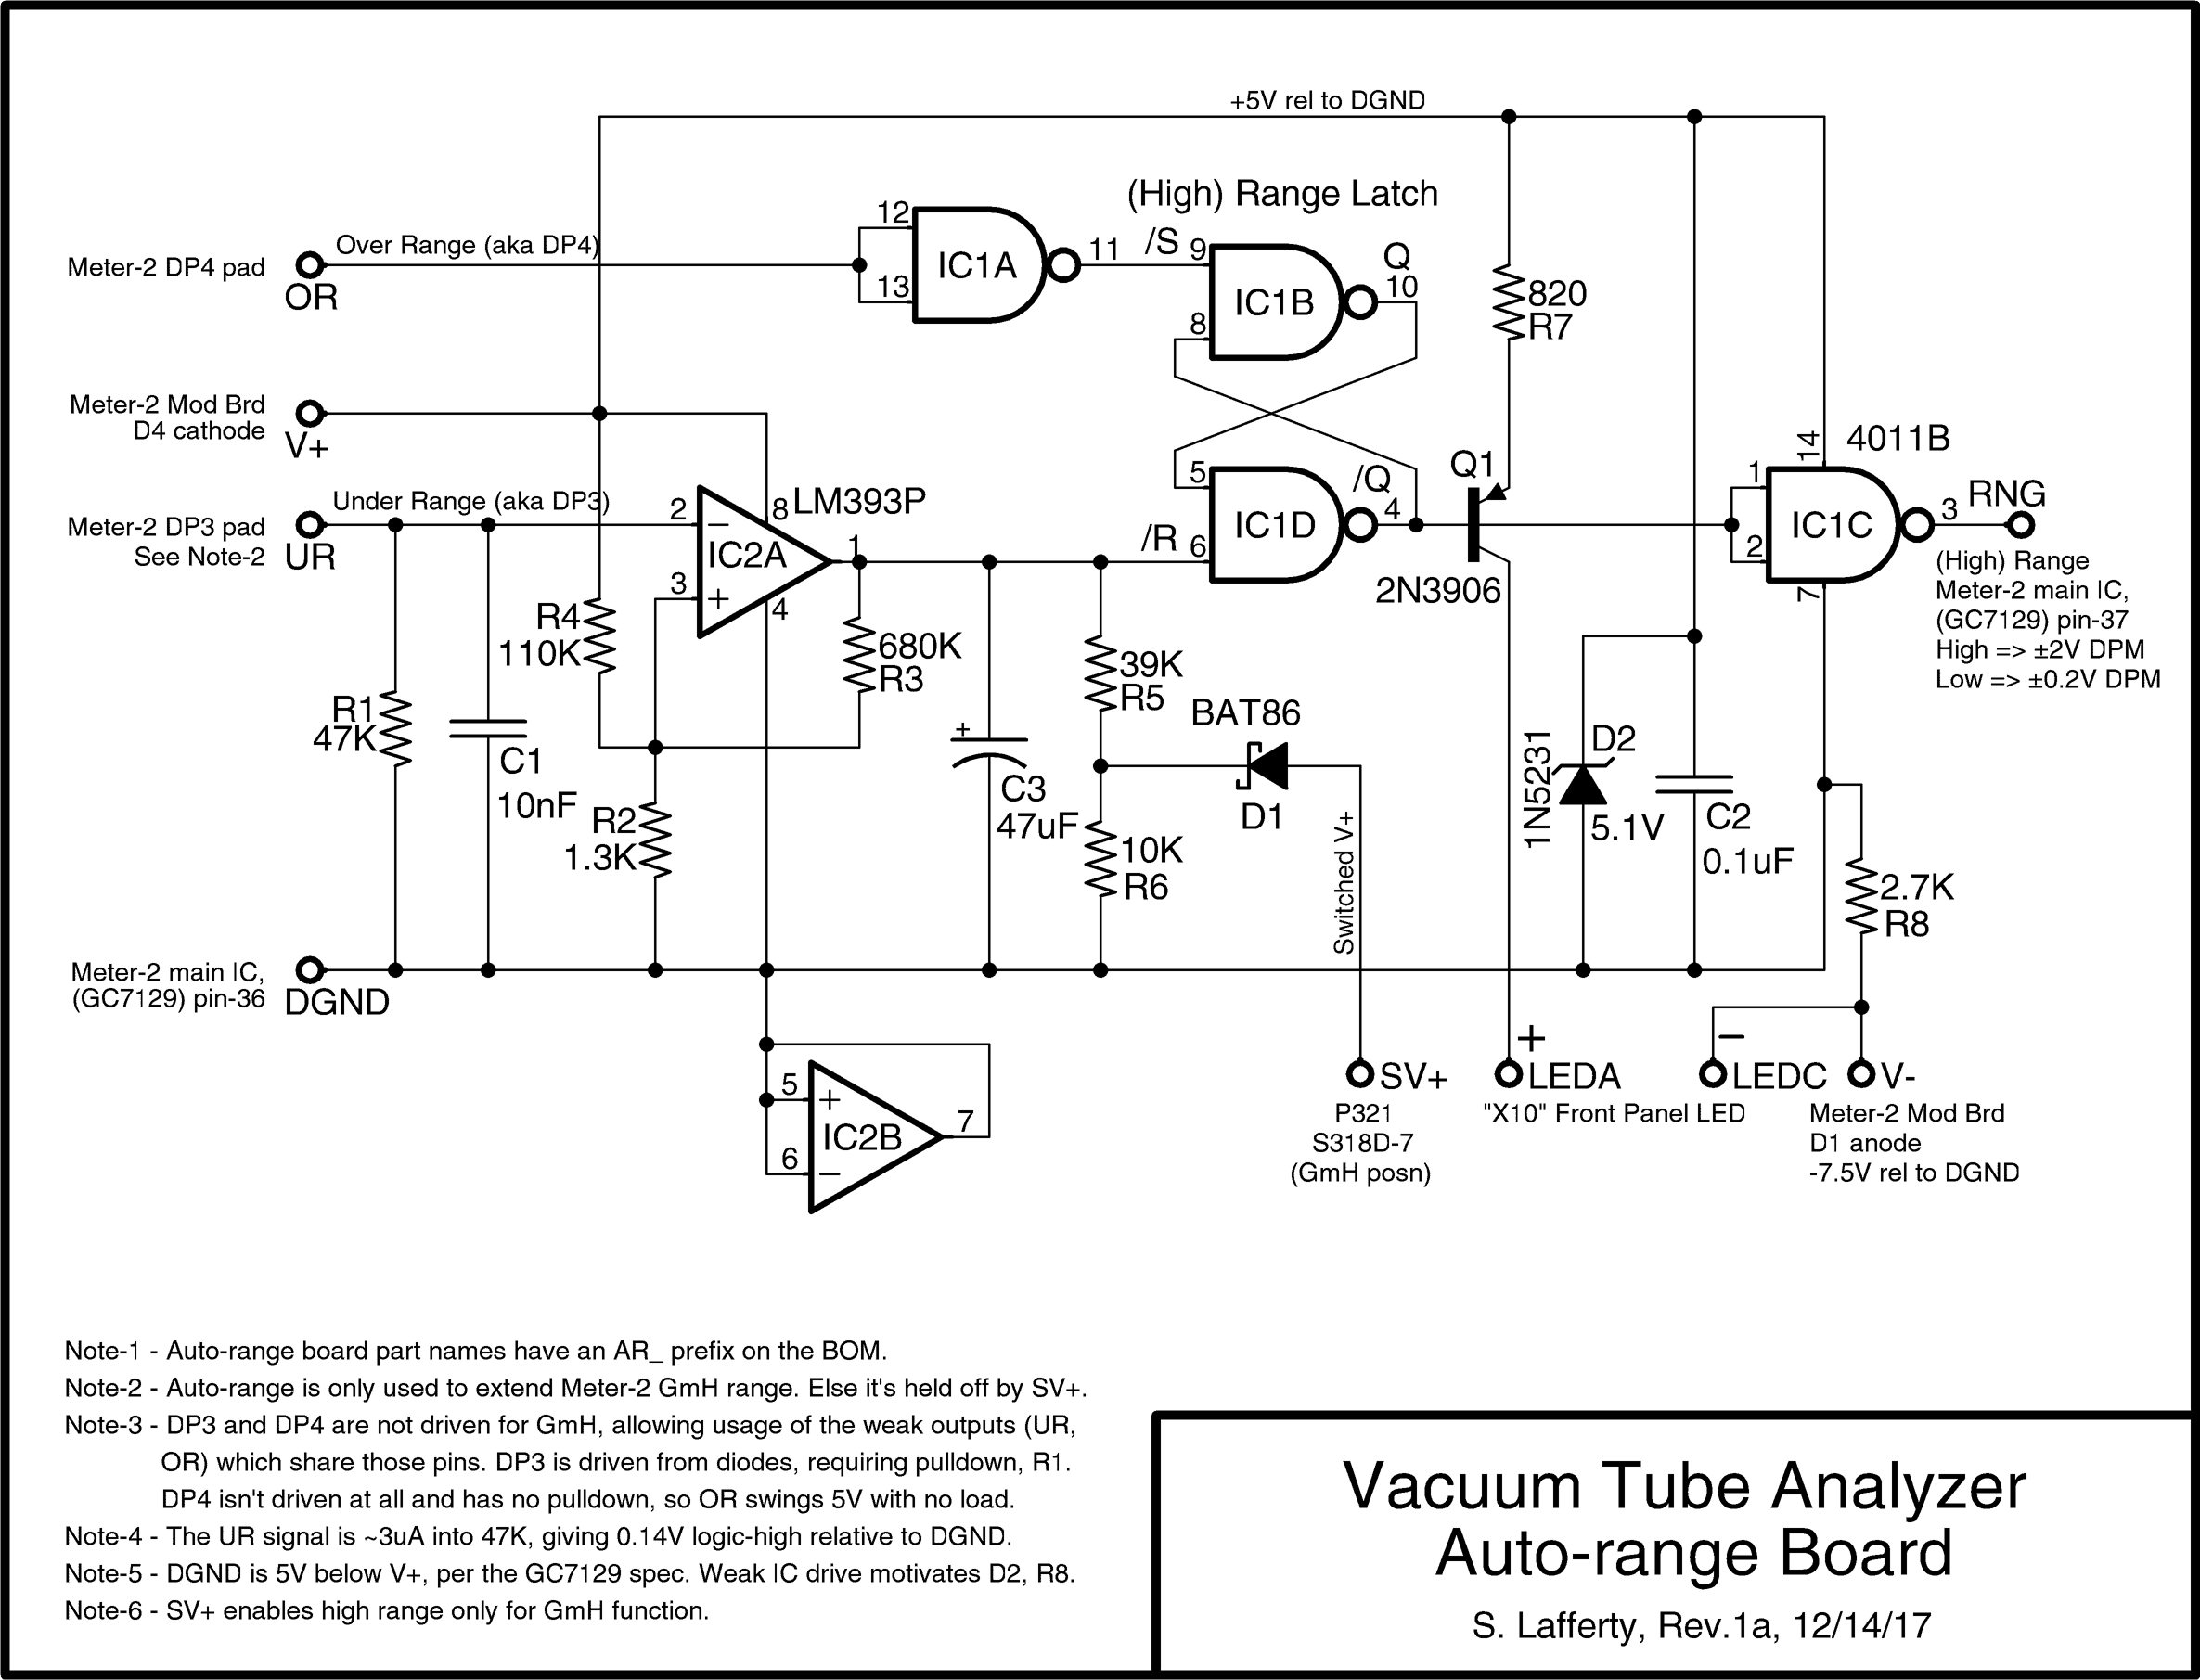
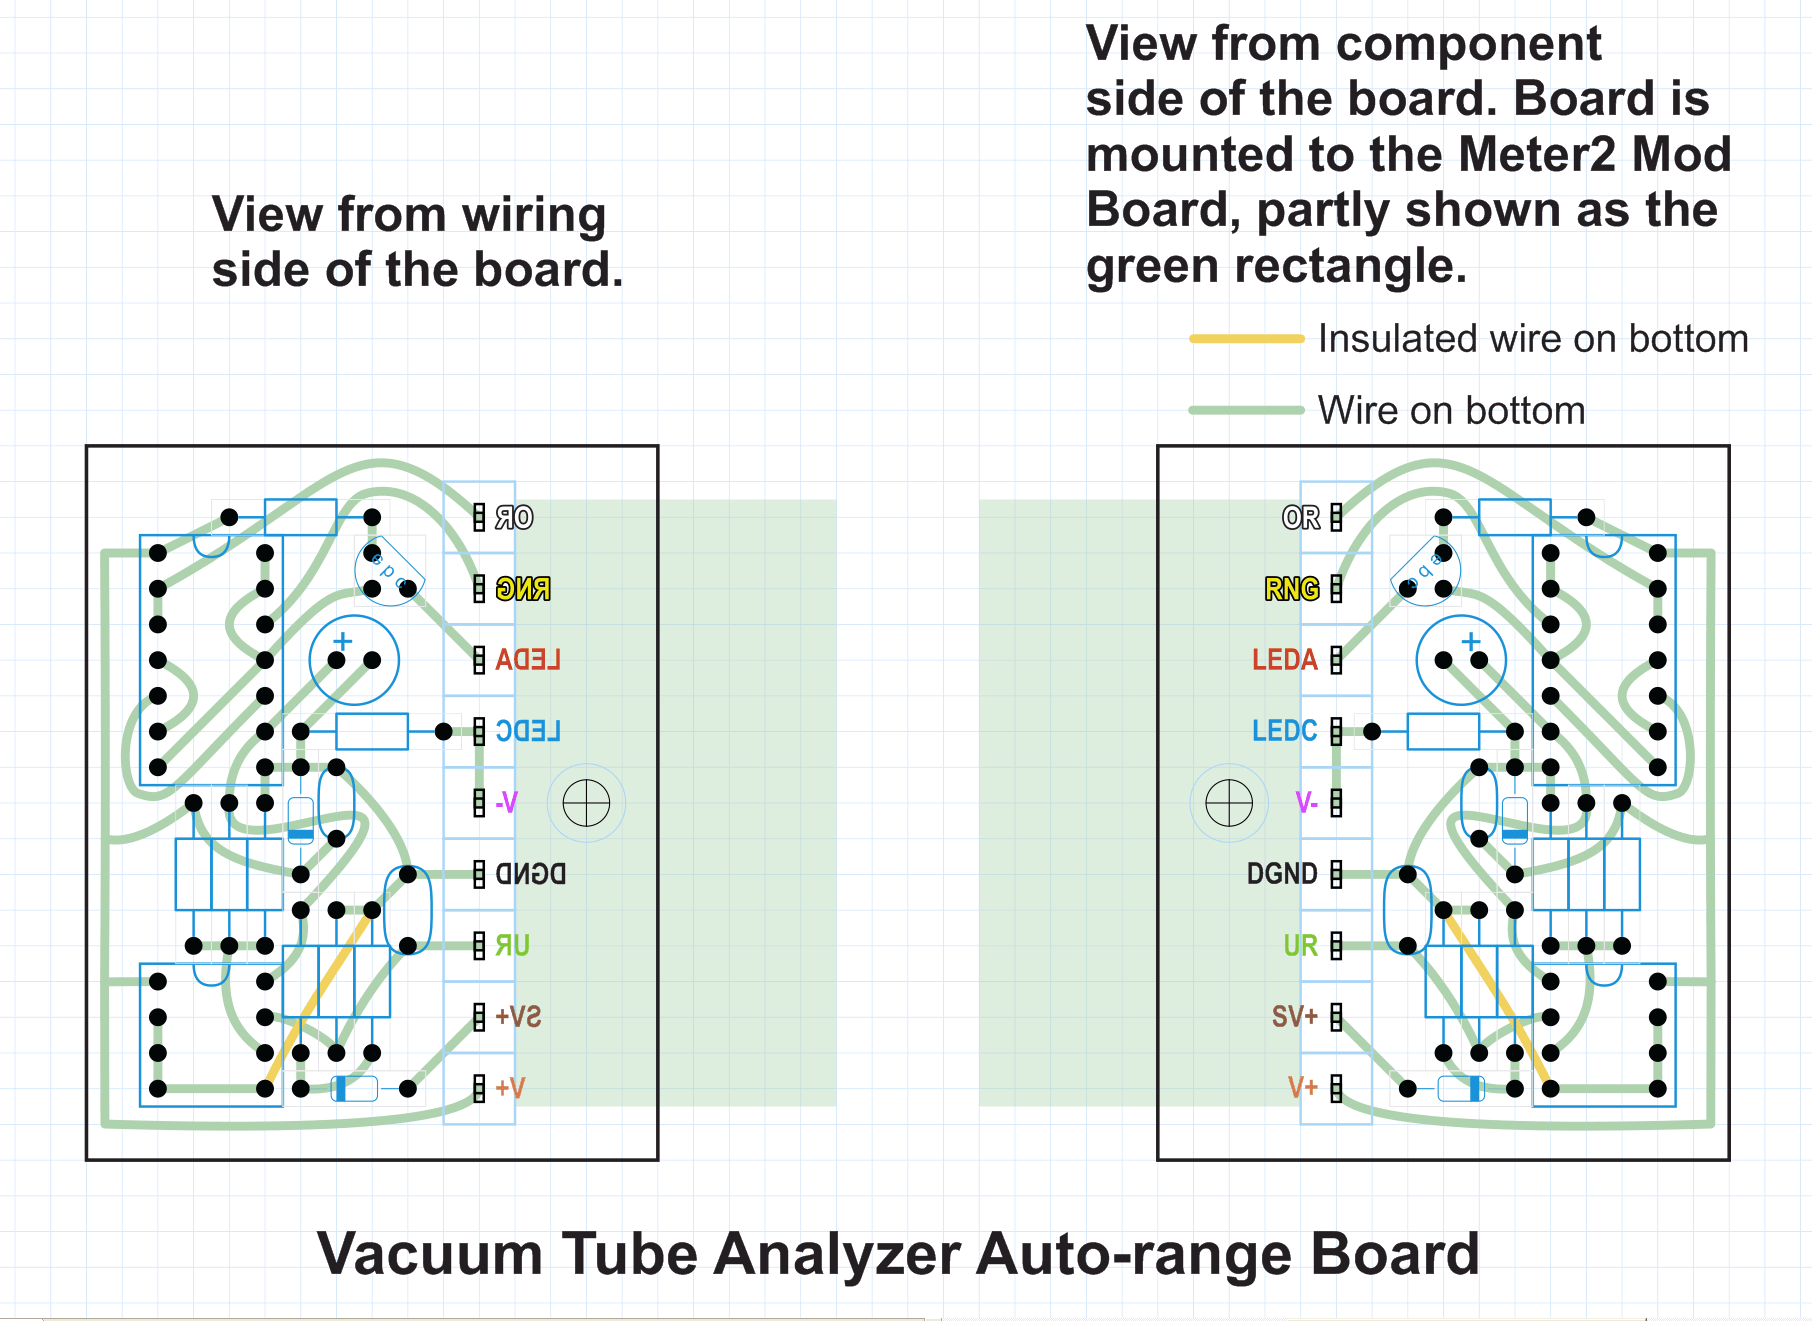
- There are hand-wired perfboards needed, including the power supply board, (plate) mod board, two function switch boards and the auto-range board.
- You could consider replacing the pin switches with a patch board of shrouded banana connectors but that would abandon the system of drive and sense lines which eliminate the effect of voltage drops in wires and connections. Drive and sense lines are switched and routed separately to the tube pins. Each pin switch has two poles.
- Please realize that I cannot guarantee that another build of the VTA would work well. However, I would do all I can to help you debug it.
I would be amiss if I didn’t warn that trying to reproduce the VTA would be a very difficult project, even for an experienced and advanced electronic hobbyist. Anyone else would be foolhardy to attempt it. The amount of time required would be enormous and the cost would be in the thousands of dollars. To close on a positive note, I must say that the VTA has fulfilled my dreams of having a great tube tester. I would like nothing better than to have the design on which I labored for so long, help others as well.
 Schematics and Other Documentation Schematics and Other Documentation
You can download a Zip file of everything listed below, here. (23MB)
A word about the Main Board schematic: It was drawn densely so it could be printed legibly on letter size paper. Sorry that it’s not as easy to understand as it could be. It would be best to start with the Plate Regulator concept and simplified schematics, before attempting to read the Main Board Schematic.
Circuit Boards and Modules
Mods Needed on the PCB
 Bill of Materials Bill of Materials
CAD Files and PCB Manufacture Packages (Eagle pro v.5)
Artwork for Front, Top and Rear Panels
Other Documentation
Acknowledgment
I would like to thank Arthur Grannell for reviewing this article in great detail and for many valuable suggestions about improvements.

The trajectory seen in Gm measurements after the test is started may be explained by Spangenberg in Vacuum Tubes, first edition, 1948, pp.44,45: “...if the emission is partly contaminated or partly exhausted, there will be evident an adjustment of emission over a period of seconds or even minutes as the current drawn is suddenly changed.”
Copyright © 2017-2018 by Stephen H. Lafferty
|


